A roof replacement is one of the biggest home improvement projects you will take on. It can feel overwhelming going in, but the roof replacement process is more straightforward than most homeowners expect. Knowing what happens at each stage keeps the project organized and takes a lot of the stress out of it.
Alfred’s Roofing has served homeowners across Southwest Washington since 1994. Roofs in this region deal with steady rain, shaded slopes, and years of moss buildup that can hide damage under old shingles until the tear-off begins. Setting clear expectations upfront makes the whole experience smoother. It also helps you feel confident about what is happening above your ceiling and what to expect at each step.
Here is what happens during a roof replacement, from the initial tear-off to the final cleanup, so you know exactly what to expect. Whether you are planning a replacement or already have one on the calendar, understanding the process makes a big difference.
How to Prepare for a Roof Replacement
A little prep on both sides goes a long way before the first shingle comes off. Your roofing contractor handles the logistics on their end, and there are a few things you can do to get your property ready on yours. Knowing what falls on each side keeps the first day of your roof replacement running smoothly.
What Your Contractor Handles
Your contractor confirms material delivery, staging areas, and safety planning before the crew shows up. Dumpsters or disposal trailers get placed in spots that keep debris contained and out of the way of everyday traffic around your home.
Crews also lay protective tarps or plywood around the perimeter of the house to catch nails and old shingles as they come down. It is a standard step that protects your landscaping, siding, and walkways, and keeps the rest of your property clean from tear-off through final cleanup.
What You Can Do to Prep
A few small moves on your end make the job site safer and easier to work. Pull vehicles out of the driveway so the crew has clear access for materials and equipment. Take down wall art, framed photos, and anything fragile hanging on exterior walls, since tear-off vibrations can knock them loose.
Outdoor furniture, potted plants, and decorative items near the house should also be moved clear of the work zone. Roofing crews are careful, but falling debris can still land in garden beds or on patio pieces you would rather not replace.
Good prep on both sides keeps the job site organized, protects your property, and lets the crew focus on the actual work ahead.
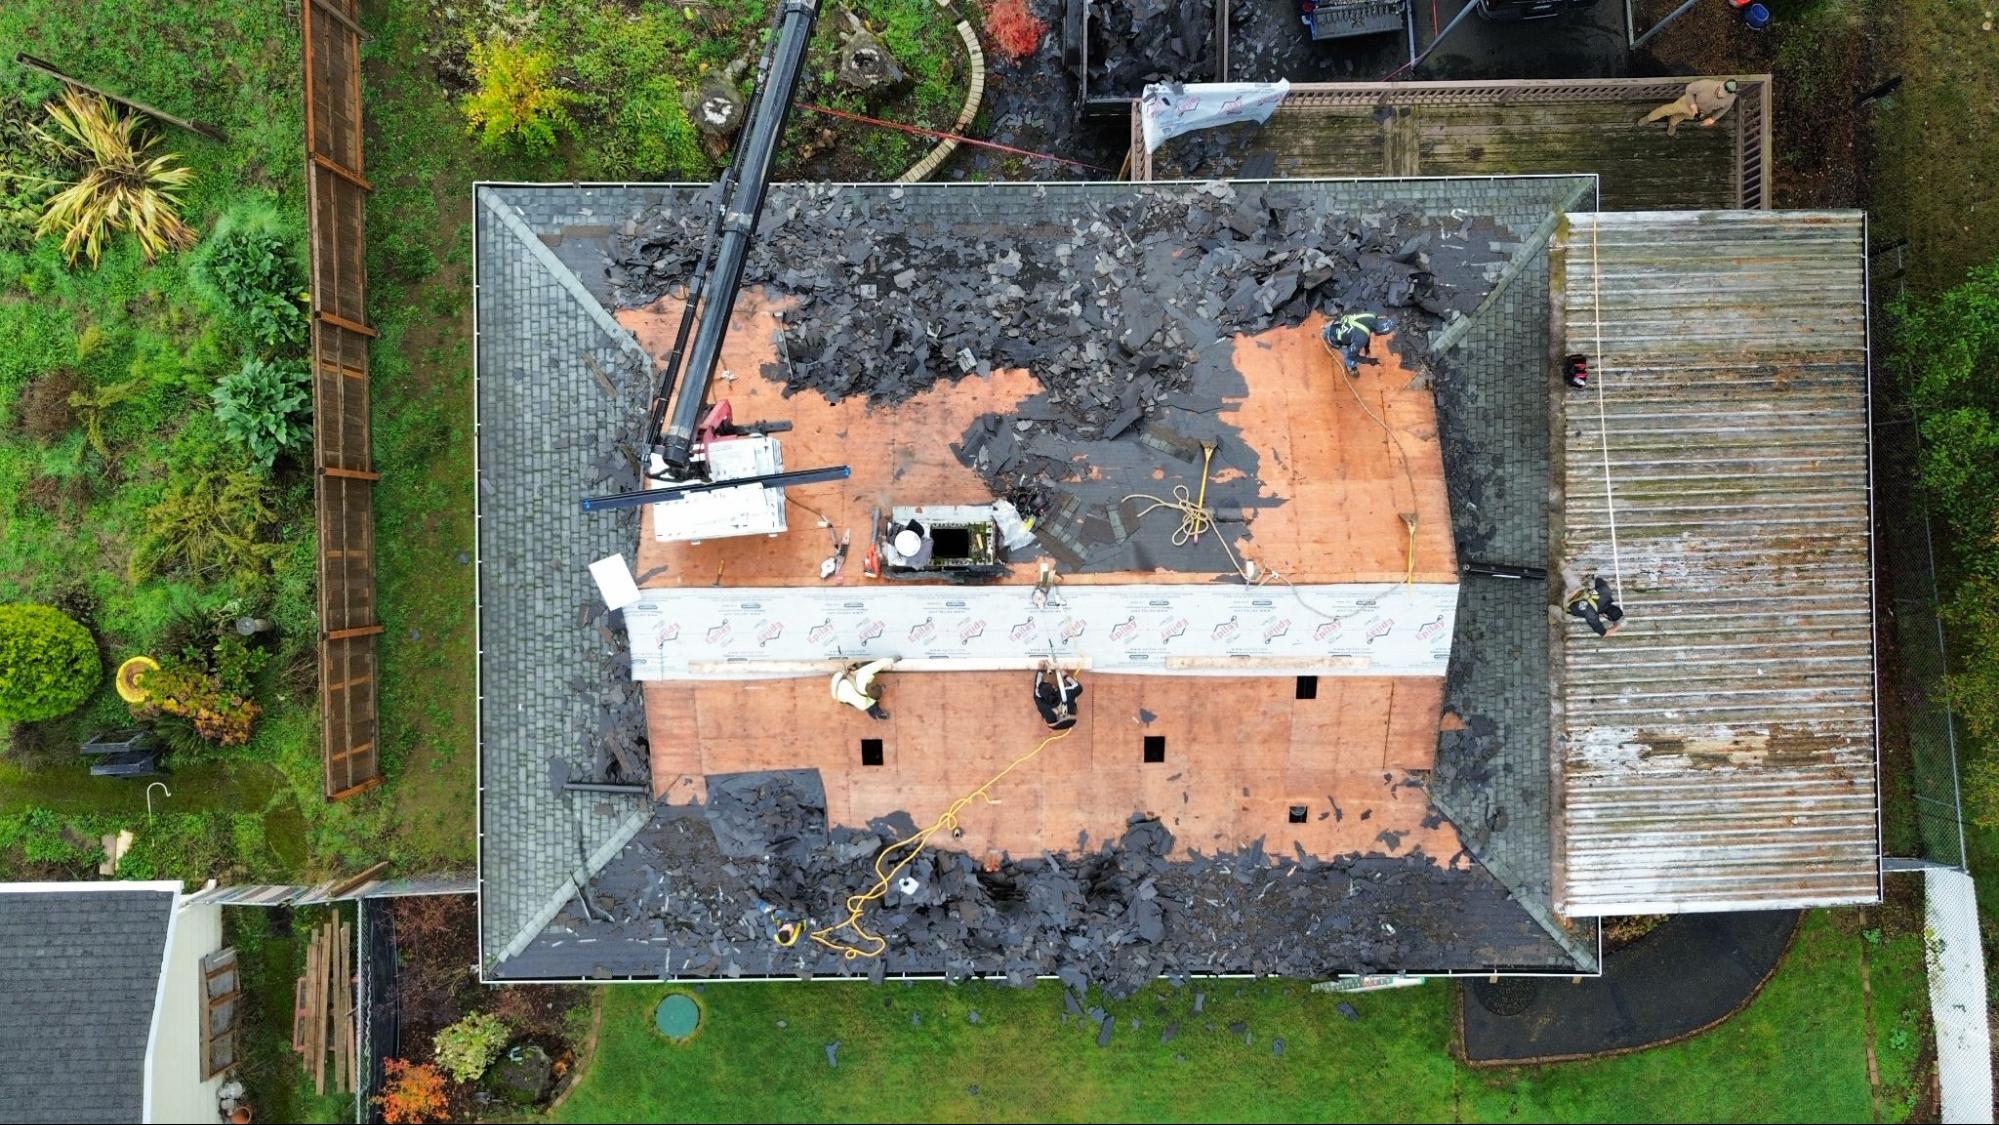
Step 1: Removing the Existing Roofing Materials
The first step in the roof replacement process is a full tear-off. Crews strip off old shingles, underlayment, and any flashing that cannot be reused, going all the way down to the bare wood decking. It is the loudest part of replacing a roof, but it is also the only way to start fresh. Laying new shingles over old ones hides damage underneath and cuts years off the lifespan of your new roof.
Old materials get loaded into the dumpster or disposal trailer as they come off, clearing the deck for the inspection that comes next.
Step 2: Roof Decking Inspection
A roof deck inspection happens right after tear-off and before any new materials go on. The deck is the layer of plywood panels directly beneath your roofing system, and its condition sets the foundation for everything that goes on top. If the deck is compromised, no amount of premium shingles or underlayment will perform the way it should.
During a roof inspection at this stage, the crew checks for:
- Soft spots or flex underfoot: Sections that give when stepped on usually mean moisture has gotten in and weakened the plywood.
- Visible rot, warping, or water stains: Long-term leaks leave decay, swelling, or discoloration that only shows once the shingles come off.
- Loose or missing fasteners: Nails no longer holding tight mean the panels can shift under a new roof and compromise the install.
- Gaps or separation between panels: Decking that has pulled apart at the seams creates weak points where water can work its way underneath.
Anything compromised gets replaced before new materials go on. We walk you through what we find and what needs to happen before moving forward. Deck repairs are a separate roofing service from the replacement itself and are billed on their own, so there are no surprises when the invoice lands.
Step 3: Installing Protective Underlayment
With the deck cleared and any repairs handled, the next step in the roof replacement process is underlayment. Underlayment is a water-resistant barrier that sits between the decking and the shingles, giving your roof a secondary layer of protection if wind-driven rain ever gets past the surface material. In Southwest Washington, that second layer does real work through the wet months.
Installation starts at the bottom edge of the roof and works upward, with synthetic underlayment rolled out so each course overlaps the one below it to direct water down and off. A heavier self-adhering membrane called ice and water shield goes along the eaves and in the valleys, where moisture collects and backs up most often. All edges and transitions get secured before shingle installation begins, so there are no weak points hiding under the final layer.
Once the shingles go on, the underlayment disappears from view. Its job from that point forward is quiet, but it is one of the biggest reasons a properly installed roof holds up through decades of PNW weather. Cut corners here and the homeowner never sees the problem until the ceiling does.
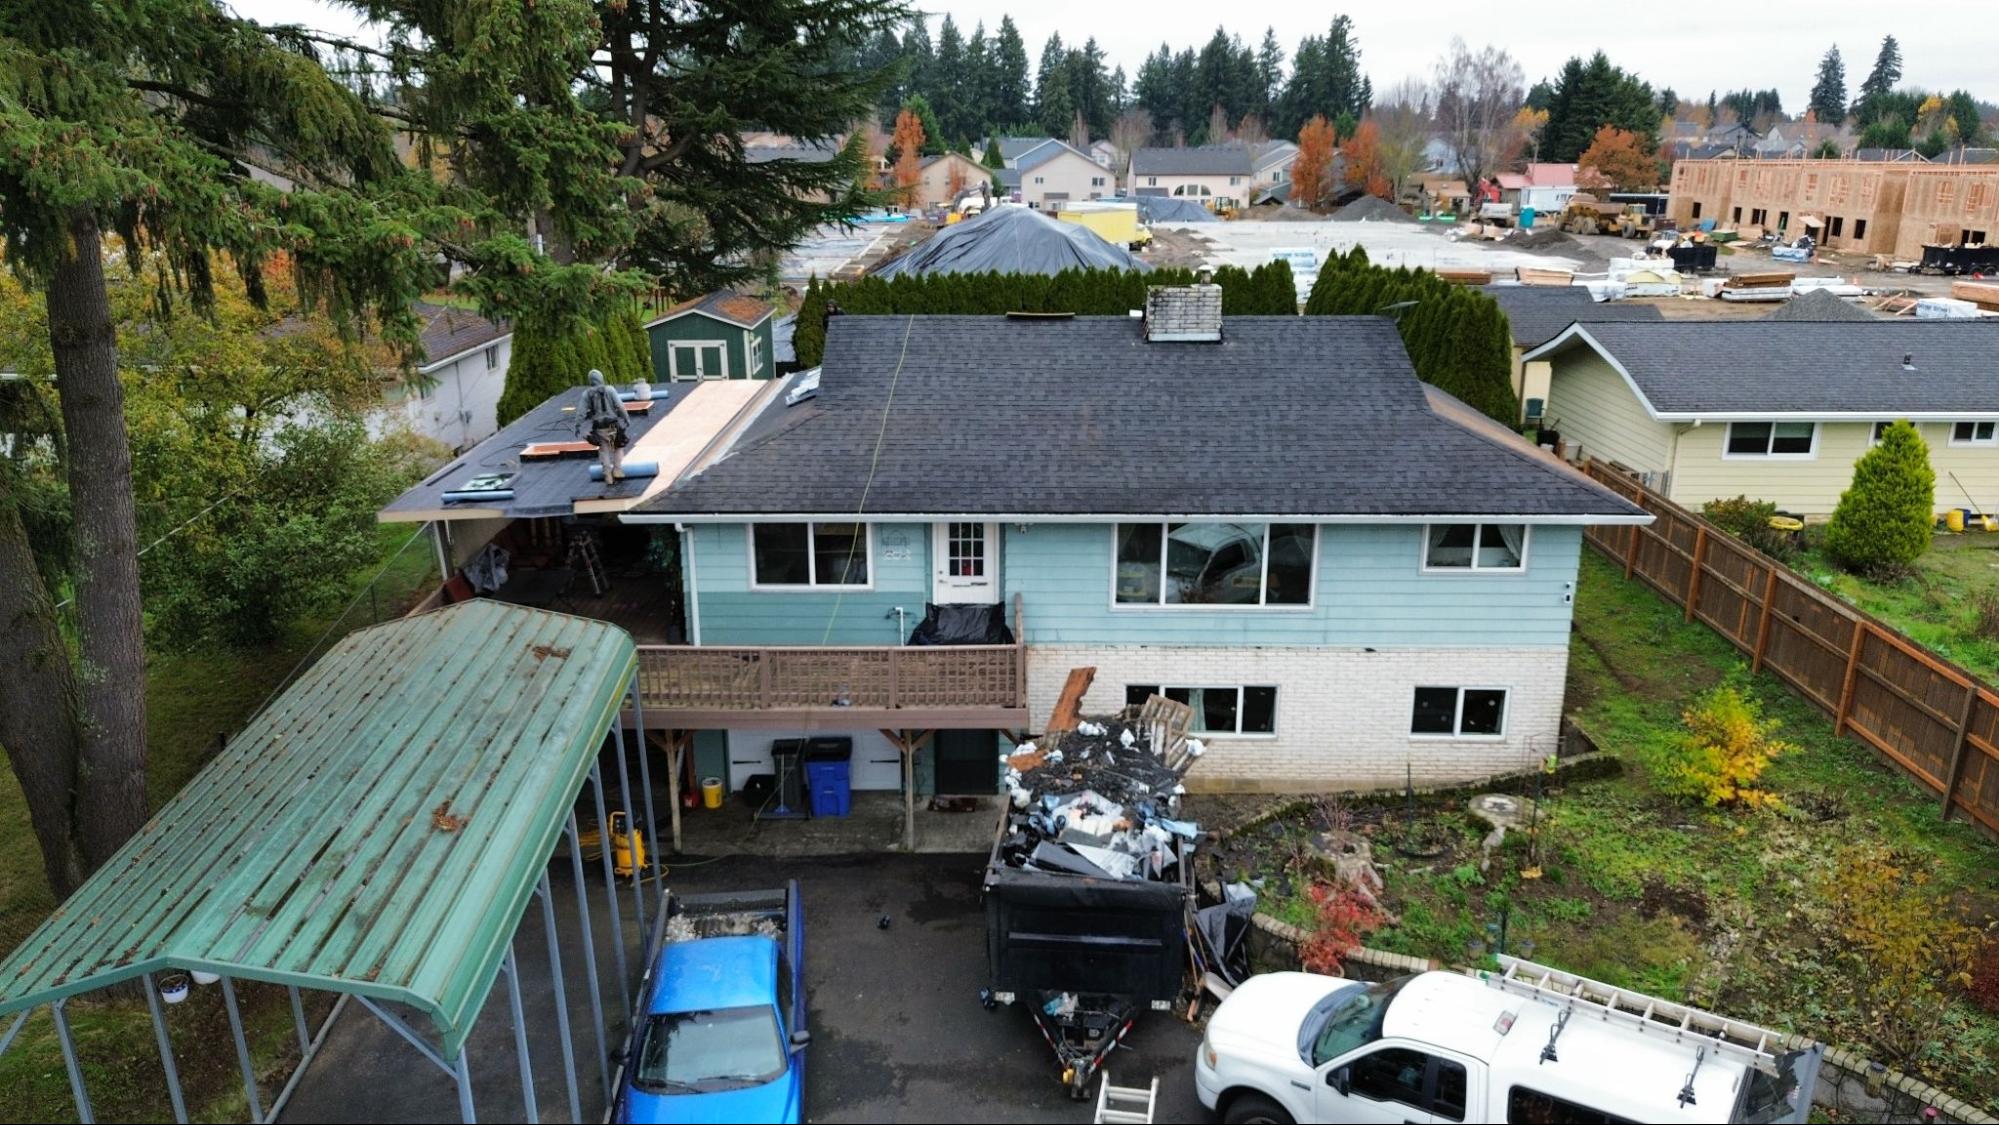
Step 4: Installing New Shingles or Roofing Material
Shingle installation is the step that turns your roof back into a roof. Crews start at the bottom edge and work upward, laying each course so it overlaps the one below to channel water down and off. This is also where the roof replacement process makes its biggest visual impact, since the material you chose becomes the defining feature of your home’s exterior.
Alfred’s Roofing installs a range of materials, and the right fit depends on the style of your home, your long-term plans, and how much maintenance you want to deal with over the next few decades. The most common options we install include:
- Architectural Asphalt Shingles. The workhorse of residential roofing. Layered, dimensional, and built to last 25 to 30 years in PNW conditions. Wide range of colors and the best cost-to-lifespan ratio for most homes. Alfred’s is also an authorized installer of premium lines like IKO Craftsman for homeowners looking to upgrade within the asphalt category.
- Designer Shingles. A premium asphalt option that mimics the look of slate, cedar shake, or tile at a fraction of the weight and cost. Ideal for homeowners who want visual character without committing to a specialty material.
- Metal Roofing. Standing seam, corrugated, and stone-coated panels built to last 40 to 60 years with minimal upkeep. Sheds water fast, resists moss, and holds up to Washington winters without breaking a sweat.
- Synthetic Slate and Tile. A lightweight alternative to natural slate or clay that delivers the same high-end look without the structural demands. Alfred’s installs Brava composite tile, which carries long manufacturer warranties and fits well on custom or higher-end homes.
Whichever material goes on, the quality of the installation is what separates a 25-year roof from a 15-year one.The material sells the roof. The install is what keeps it on the house.
Starter shingles seal the eaves, field shingles get nailed to manufacturer specs, flashing goes around chimneys, skylights, and roof-to-wall intersections, and ridge caps finish the peak. Nail placement and pattern alignment matter more than most homeowners realize. Over-driven or misplaced nails cause shingles to lift and fail years before they should, which is why a trained crew following manufacturer guidelines is what actually protects your warranty and your investment.
Step 5: Updating Roof Ventilation
Roof ventilation is one of the most overlooked parts of a roofing system, but it has a direct impact on how long your new roof actually lasts. A well-vented attic gives heat and moisture a way to escape, which keeps the decking dry and stops shingles from baking themselves to an early failure. In the PNW, where shaded roofs and steady moisture already put asphalt through it, a balanced ventilation system is one of the quiet differences between a roof that hits its warranty and one that falls short.
During this step of the roof replacement process, your contractor should check that intake vents along the soffits are clear, that ridge or exhaust vents near the peak are drawing properly, and that the two are balanced for the size of your attic. If the current system is undersized, clogged, or mismatched, a full replacement is by far the easiest time to fix it. Adding or adjusting vents with the shingles off and the deck exposed is straightforward work, while doing the same job after the new roof is on turns a fifteen-minute adjustment into a half-day repair. A properly vented attic also cuts heat buildup in warmer months, and proper attic ventilation is recognized by the Department of Energy as part of a well-weatherized home, which means lower energy bills long after the crew leaves.
Step 6: Final Inspection and Cleanup
No roof replacement is finished until the final walkthrough is done and the property is back in order. Before signing off, the crew inspects shingle alignment across the entire roof surface, checks that flashing is sealed at every penetration and transition, confirms the ridge cap is clean along the peak, and handles any touch-ups the walkthrough turns up. Site cleanup gets the same attention as the install itself. A magnetic roller runs across the yard and driveway to pick up stray roofing nails, old roofing materials get loaded out, and the job site goes back to the homeowner in the same shape it was in before the trucks rolled in.
A roof replacement is not finished when the shingles are on. It is finished when the walkthrough is done and the yard is clean.
This is one of the roof replacement steps most contractors cut corners on, and it is one of the easiest to spot from the ground. You should never be the one cleaning up after a roof replacement. A thorough walkthrough and a clean property are how Alfred’s Roofing closes out every project, and they are the kind of details worth asking about before you sign with any contractor.
FAQs about the Roof Replacement Process
How do I know if I need a roof replacement instead of a repair?
A roof replacement is usually the right call when your roof is 15 to 20 years old, has widespread shingle damage like curling, cracking, or missing sections, or is developing leaks in more than one spot. Repeated repairs on an aging roof often cost more over time than starting fresh. A professional roof inspection gives you a clear answer.
How long does a roof replacement take?
Most residential roof replacements take one to three days from start to finish. Timing depends on the size and complexity of the roof, whether any deck repairs are needed, and the weather, which matters in the PNW where rain can push jobs back a day or two. Your contractor should give you a timeline upfront and update you if anything shifts.
Do I need to be home during the roof replacement process?
You do not need to be home the whole time, since most roofing crews work independently once the project starts. Try to be around at the beginning of the job and for the final walkthrough, and keep your phone nearby in case the crew finds deck damage or other issues that need a quick approval.
What does a roof replacement cost in Washington?
Roof replacement cost depends on the size of the home, the pitch and complexity of the roof, the material you choose, and whether any decking needs replacing. The most accurate number comes from an on-site estimate. For homeowners planning a full replacement, Alfred’s Roofing also offers financing options to help spread the investment out.
Do you need a permit to replace a roof in Washington?
Yes. Washington requires a permit from your local building department for any full roof replacement, and your contractor should pull it on your behalf as part of the project. Permits confirm the work meets state and local codes and protect your investment if you ever sell the home.
Know What to Expect From Your Roof Replacement
Understanding the roof replacement process takes the guesswork out of one of the bigger home improvement decisions you will make. When you know what happens at each step, from tear-off through final cleanup, you walk into the project with the right questions, a clearer picture of what your contractor is doing, and real peace of mind that the work is being done right.
Alfred’s Roofing has served homeowners across Clark County and Southwest Washington since 1994. Whether you are planning a replacement before the next wet season or just want to talk through roofing materials, reach out to our experts and we will walk you through the process and answer any questions along the way.